Code documentation
How Slips Works

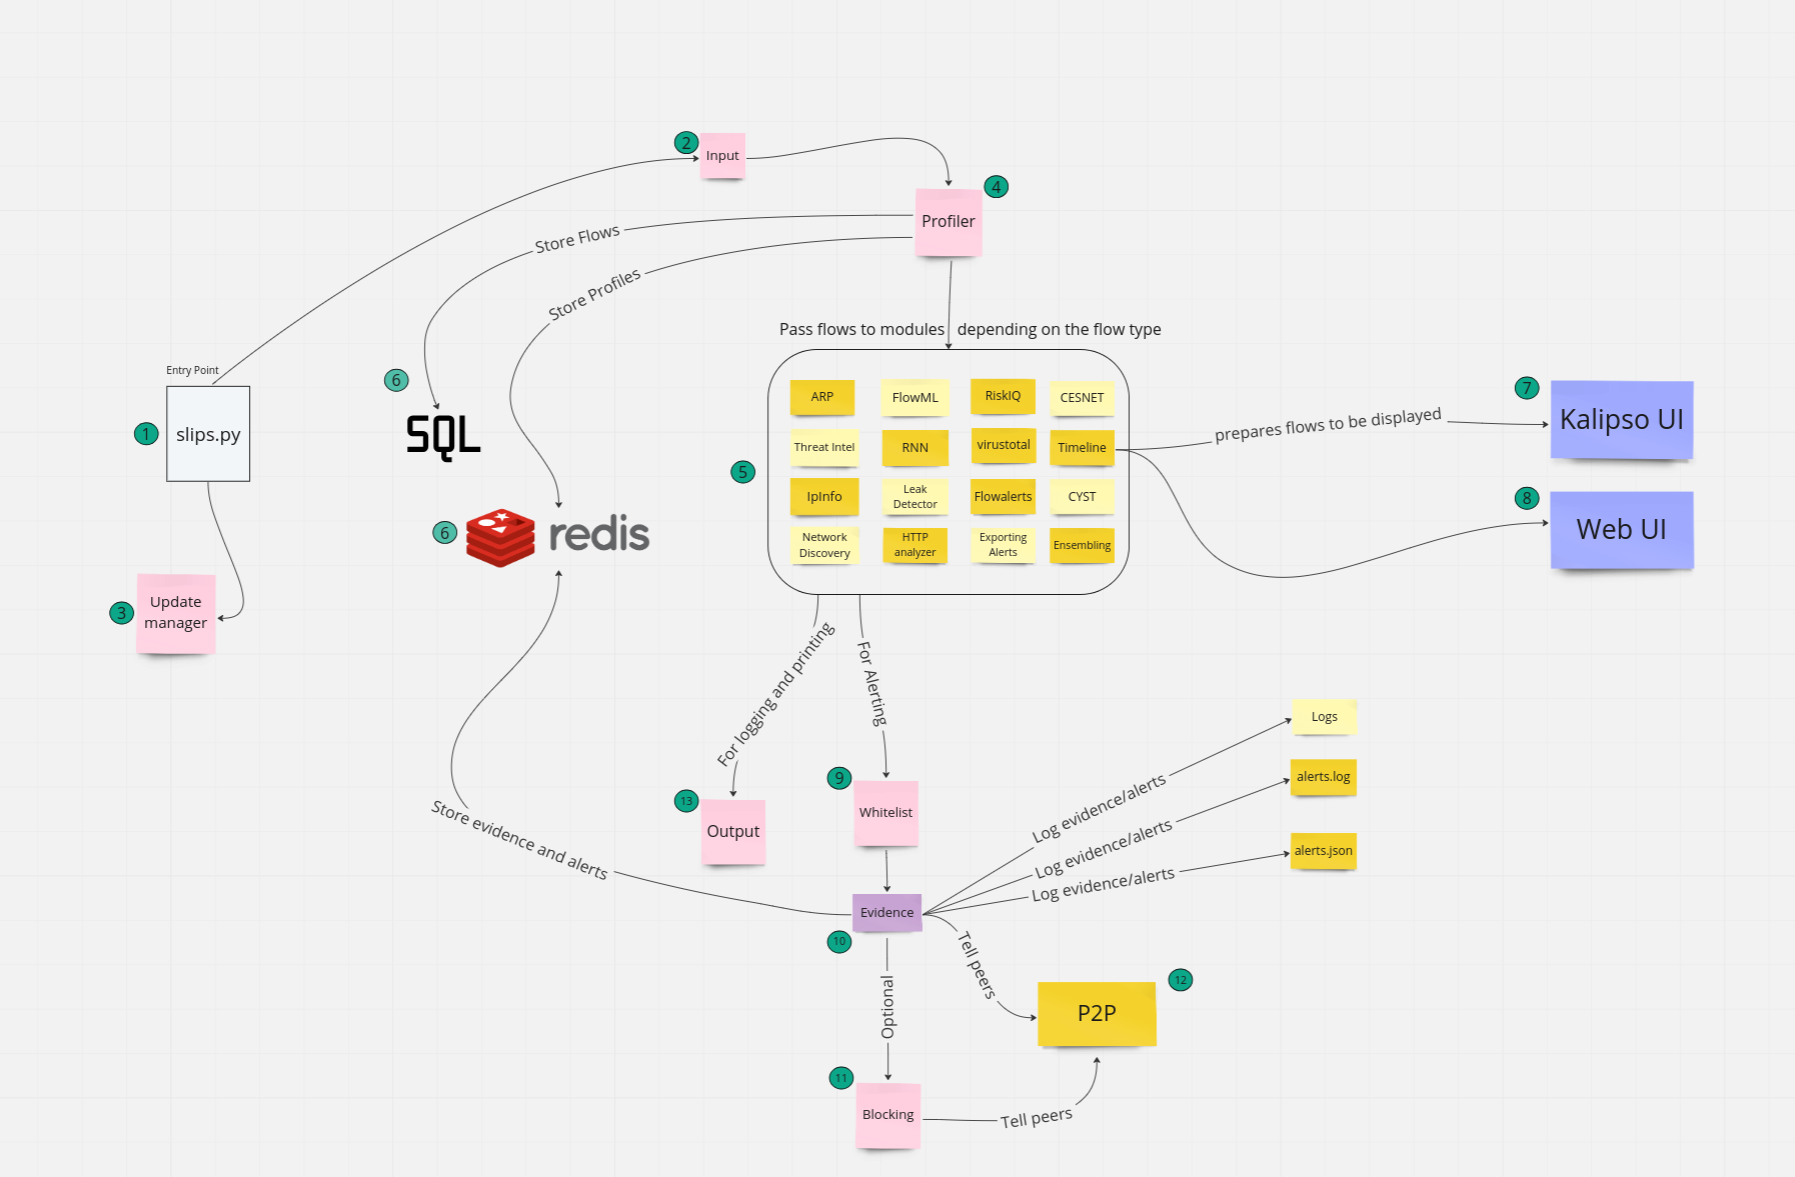
slips.py is the entry point, it’s responsible for starting all modules, and keeping slips up until the analysis is finished.
slips.py starts the input process, which is the one responsible for reading the flows from the files given to slips using -f it detects the type of file, reads it and passes the flows to the profiler process. if slips was given a PCAP or is running on an interface , the input process starts a zeek thread that analyzes the pcap/interface using slips’ own zeek configuration and sends the generated zeek flows to the profiler process.
slips.py also starts the update manager, it updates slips local TI files, like the ones stored in slips_files/organizations_info and slips_files/ports_info. later, when slips is starting all the modules, slips also starts the update manager but to update remote TI files in the background in this case.
Once the profiler process receives the flows read by the input process, it starts to convert them to a structure that slips can deal with. it creates profiles and time windows for each IP it encounters.
Profiler process gives each flow to the appropriate module to deal with it. for example flows from http.log will be sent to http_analyzer.py to analyze them.
Profiler process stores the flows, profiles, etc. in slips databases for later processing. the info stored in the dbs will be used by all modules later. Slips has 2 databases, Redis and SQLite. it uses the sqlite db to store all the flows read and labeled. and uses redis for all other operations. the sqlite db is created in the output directory, meanwhite the redis database is in-memory. 7-8. using the flows stored in the db in step 6 and with the help of the timeline module, slips puts the given flows in a human-readable form which is then used by the web UI and kalipso UI.
when a module finds a detection, it sends the detection to the evidence process to deal with it (step 10) but first, this evidence is checked by the whitelist to see if it’s whitelisted in our config/whitelist.conf or not. if the evidence is whitelisted, it will be discarded and won’t go through the next steps
now that we’re sure that the evidence isn’t whitelisted, the evidence process logs it to slips log files and gives the evidence to all modules responsible for exporting evidence. so, if CEST, Exporting modules, or CYST is enabled, the evidence process notifies them through redis channels that it found an evidence and it’s time to share the evidence.
if the blocking module is enabled using -p, the evidence process shares all detected alerts to the blocking module. and the blocking module handles the blocking of the attacker IP through the linux firewall (supported in linux only)
if p2p is enabled in config/slips.conf, the p2p module shares the IP of the attacker, its’ score and blocking requests sent by the evidence process with other peers in the network so they can block the attackers before they reach them.
The output process is slips custom logging framework. all alerts, warnings and info printed are sent here first for proper formatting and printing.
This is a brief explanation of how slips works for new contributors.
All modules described above are talked about in more detail in the rest of the documentation.